Adding a New Field to an Existing Module
This doc explains how to add a new field to an existing module. Consider that the core system/Transact has an additional field named Birth Country that you want to add to the Personal Information module of the Temenos DigitalOrigination journey. Currently, the Personal Info section is as follows.
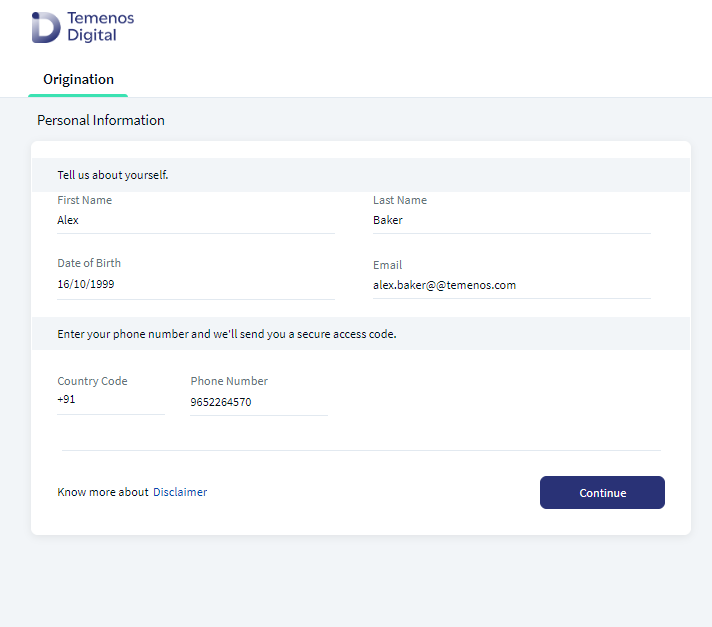
You must make the following changes to add a field for Birth Country in the Personal Information module.
- As the Birth Country field is already available in Transact, you need not configure the DBX DB.
- The changes mentioned above are sufficient for the Applicant and Co-Applicant sections.
Client Application Extensions
This section provides information about the client-side changes required to add the Birth Country field to the Personal Information module. Client Application Extensions involve configuring the following elements:
UI/UX Modifications:
UI/UX modifications represent the changes required to enable the Birth Country field. As the UI is non-extensible, you must update the necessary forms directly. In this case, you have to create a new entry in the form that is associated with the Personal Information section. To do so, make the following configurations in the Temenos DigitalOrigination Visualizer project.
- Go to Project Explorer > Forms. Open the form containing the Personal Information section.
Consider that you want to add the Birth Country field after the Email Address field. To do so, you must modify the component linked to the Personal Information section. In this case, the personal information section uses thecom.nuo.UserInformationcomponent. - Go to Templates and search for
com.nuo.UserInformationcomponent, and add a new flex row for birth country below the UI element of the email address. - In the Action Editor, configure the Flex fields for this flex row.
- After configuring the Flex fields, insert the
com.loans.AnimatedTextBoxcomponent into the new flex row and rename it atbxBirthCountry. - Open the lblAnimatedKA label and configure the following fields in the Action Editor:
- Change the value of the Text field to Birth Country.
- Map the respective i18n key in the Text i18n Key field.
The designers of the implementation team create the layout of the screens. Based on the layout design, the developers of the implementation team configure the layout properties.
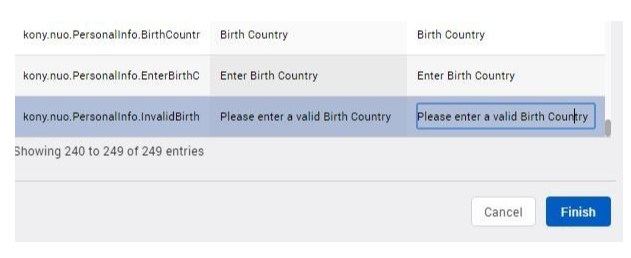
To add i18n keys for the birth country field, follow these steps.
- From the main menu, go to Edit > Internationalization. The Configure Internationalization screen appears.
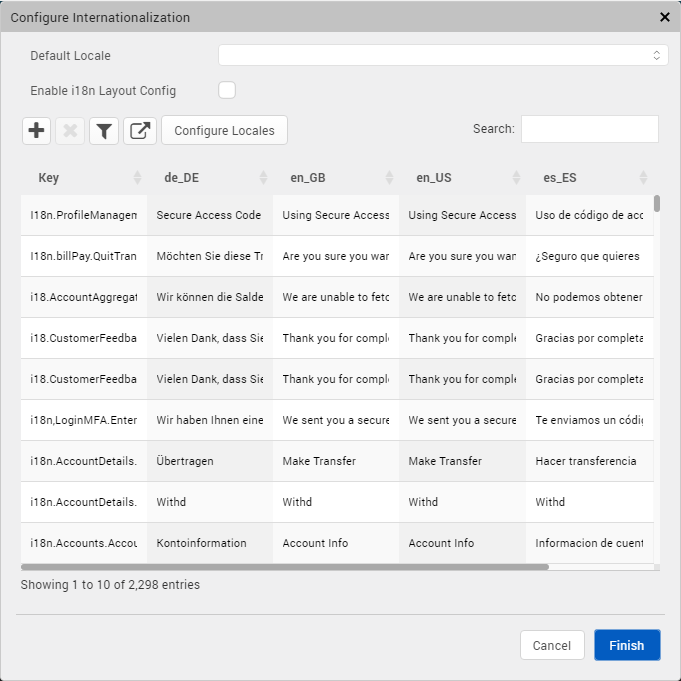
- Click the plus (+) button to add the new key.
- Add the required i18n keys as follows.
These keys are used in the code as follows.
kony.i18n.getLocalizedString("kony.nuo.PersonalInfo.InvalidBirthCountry");
Form Controller Extension
To change a form, you cannot directly modify the code in the Form Controller. You must create a Form Controller Extension and modify the code as required. A Form Controller Extension is required to validate the new fields. It includes operations such as adding a JSON payload, fetching the back-end response, and mapping the error modules.
Follow these steps to create a form controller extension in the Temenos DigitalOrigination Visualizer project.
- From Project explorer, expand the Modules section.
- Right-click the require tab and select New Require moduleto create a new JS file.
- Rename the new JS file to
PersonalInfoControllerExtn. - Define the functions required for the Birth Country field in the
PersonalInfoControllerExtnfile. The functions are as follows.- resetfocus()
resetFocus: function() { this.super('resetFocus', []); this.view.UserInformation.atbcBirthCountry.tbxAnimatedKA.onEndEditing(); } - resetSkin()
resetSkins: function () { this.super('resetSkins',[]); this.view.UserInformation.lblError2.setVisibility(false); this.view.UserInformation.atbxBirthCountry.flxUnderlineKA.skin = applicationManager.getConfigurationManager().getConfigurationValue("underlineSkin"); } - setDefaultValues()
setDefaultValues: function() { this.super('setDefaultValues', []); this.view.UserInformation.tbxAnimatedKA.text = ''; } - getPersonalinfoPayload()
getPersonalinfoPayload: function() { var extPayload = this.super('getPersonalinfoPayload', []); extPayload.BirthCountry = this.view.UserInformation.atbxBirthCountry.tbxAnimatedKA.text; return extPayload; } - populatePersonalInfo()
populatePersonalInfo: function(personalInfo) { this.super('populatePersonalInfo', [personalInfo]); this.view.UserInformation.atbxBirthCountry.tbxAnimatedKA.text = personalInfo.BirthCountry; this.resetFocus(); } - populatePartyResponse()
populatePartyResponse: function(personalInfo) { this.super('populatePartyResponse', personalInfo); this.view.UserInformation.atbxBirthCountry.tbxAnimatedKA.text = personalInfo.BirthCountry; } - populateScannedData()
populateScannedData: function(data) {
    this.super('populateScannedData', [data]);
    this.view.UserInformation.atbxBirthCountry.tbxAnimatedKA.text = "";
}
- resetfocus()
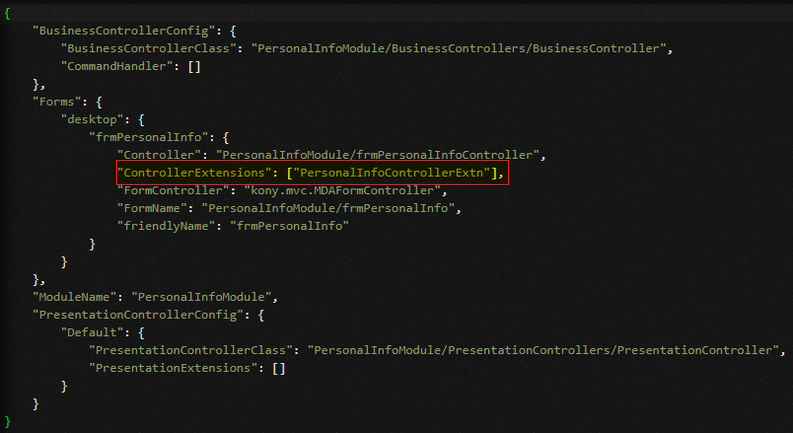
- After you define the functions, link the new extension file to your ModuleConfig file of the Personal Information module. To do so, go to Project > Reference Architecture Extensions > PersonalInfoModule > Config > ModuleConfig.
Add the following code to the Forms method:"ControllerExtensions": ["PersonalInfoControllerExtn"]
Data Validation
After adding a new field, you can define rules specific to the Birth Country field. For example, if the name of your birth country supports only ten characters and you enter an 11-character word, the app should throw an error. Define these details in the Spotlight app and Form Controller Extension. To do so, follow these steps.
- Open the Spotlight app.
- From the left pane, select System Configurations. The System Configurations page appears.
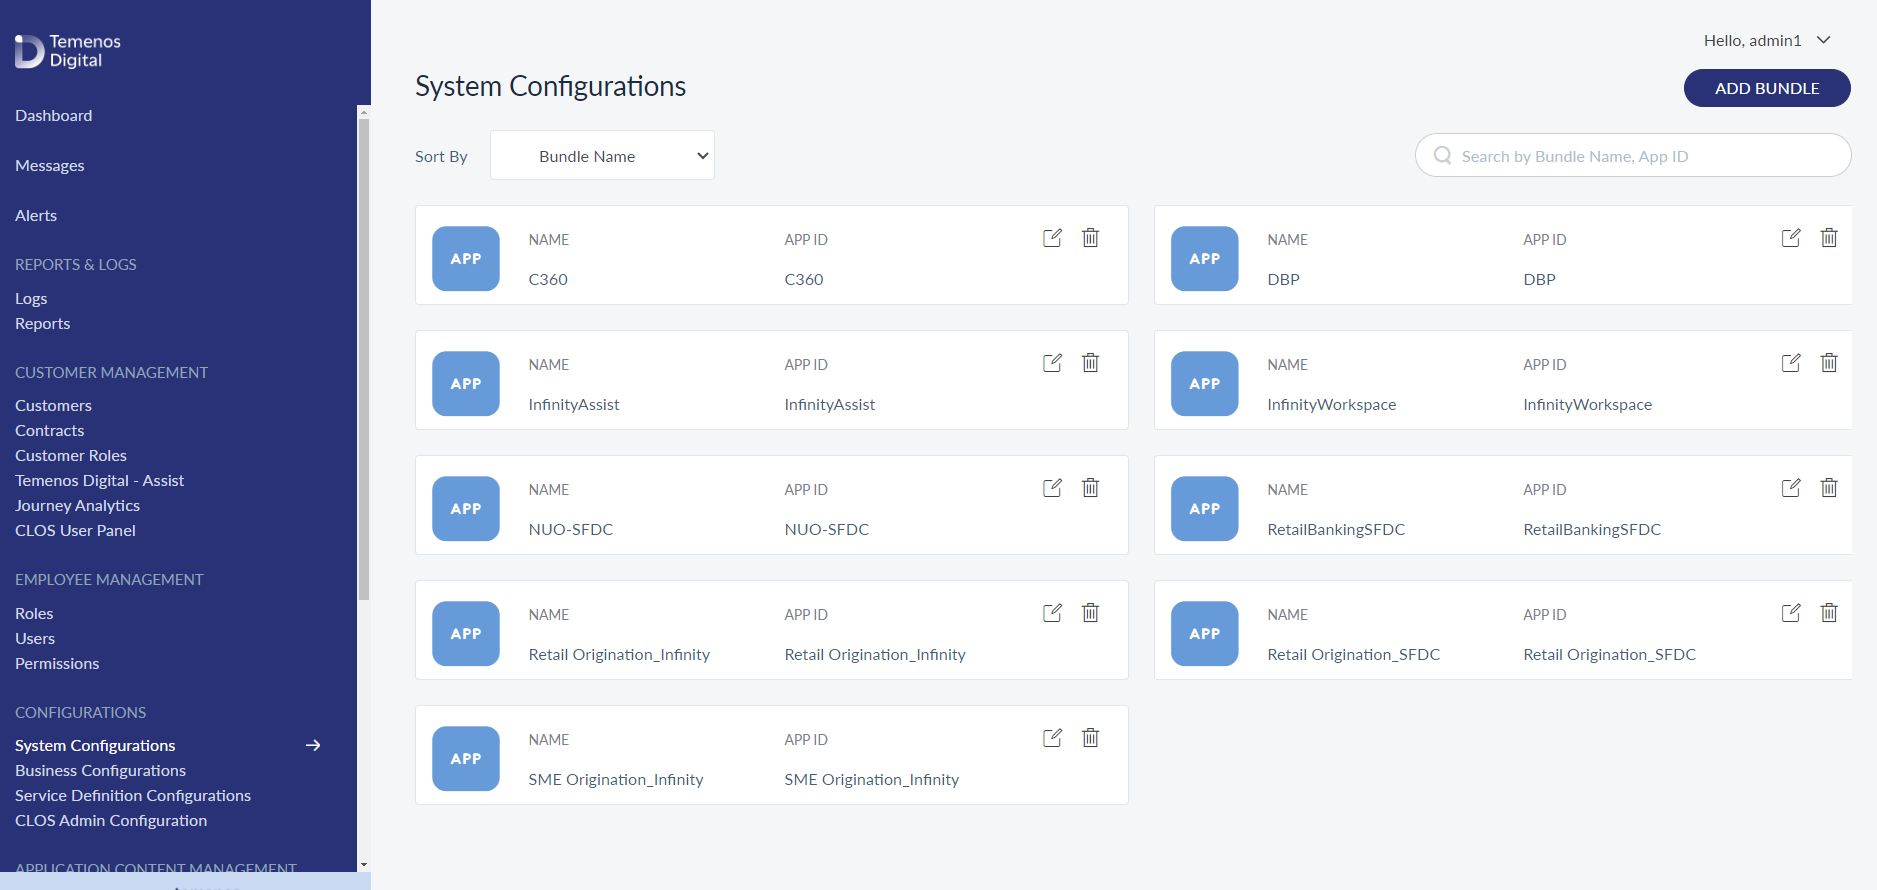
- Open the Temenos DigitalOrigination bundle named Retail Origination_Temenos Digital . The View Bundle page appears that contains the details of the Temenos DigitalOrigination keys.
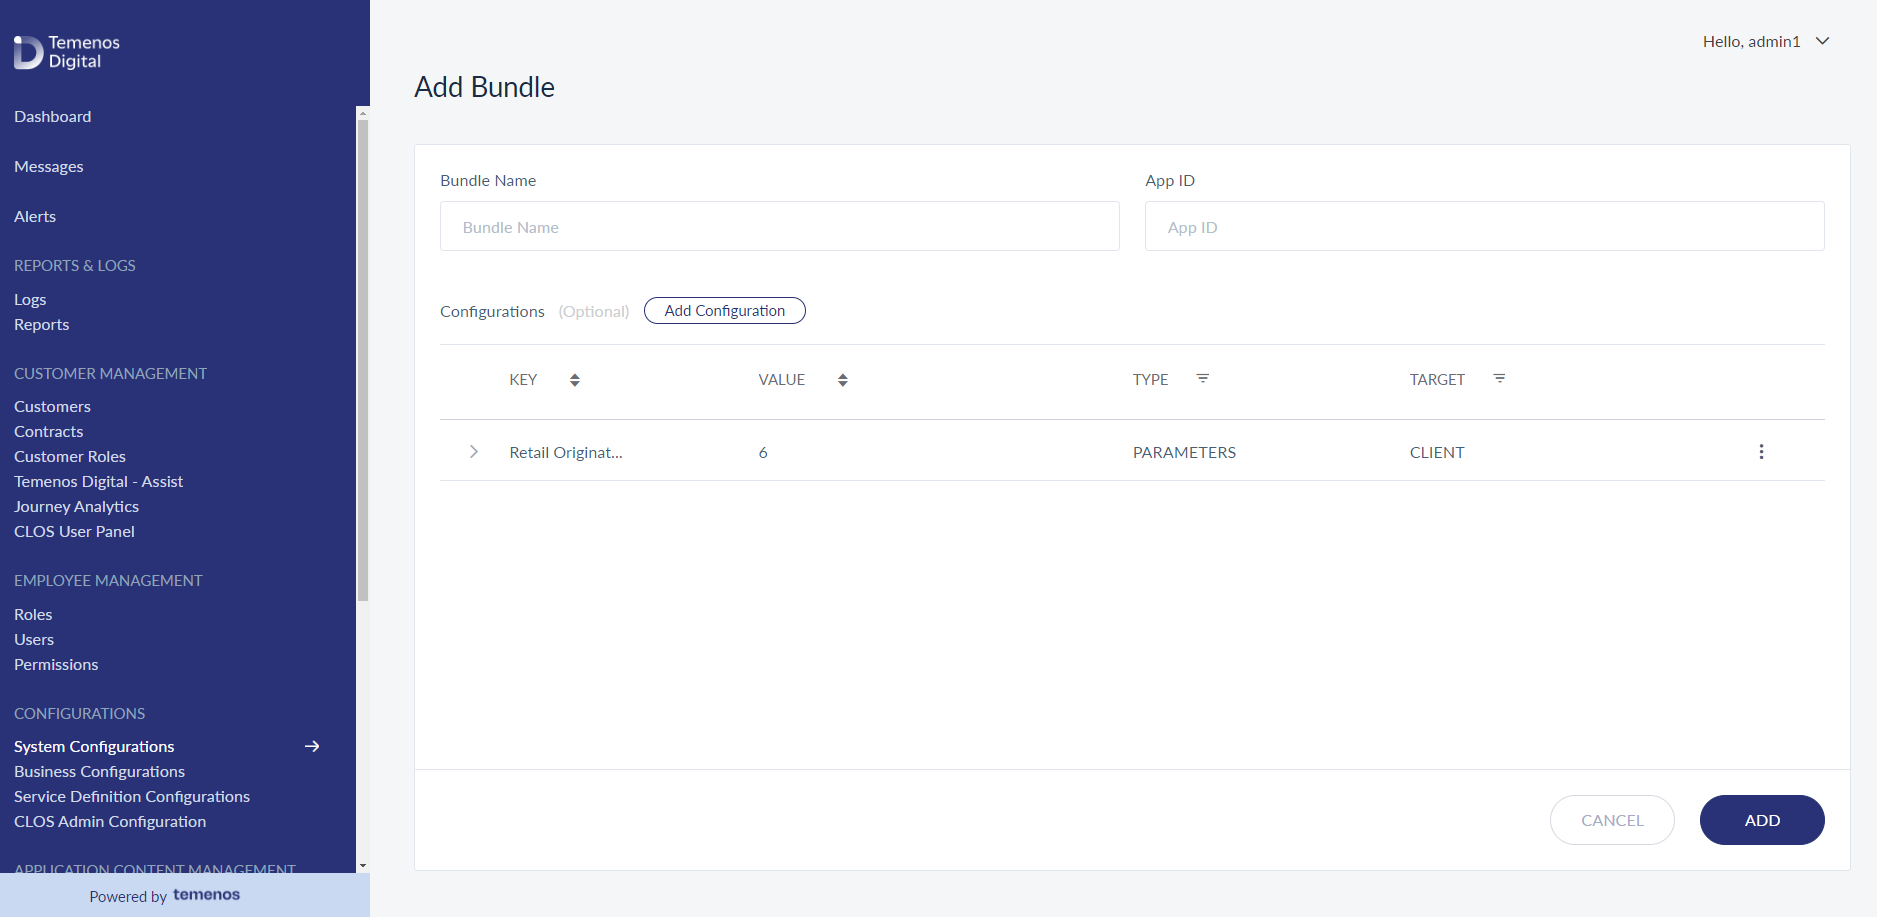
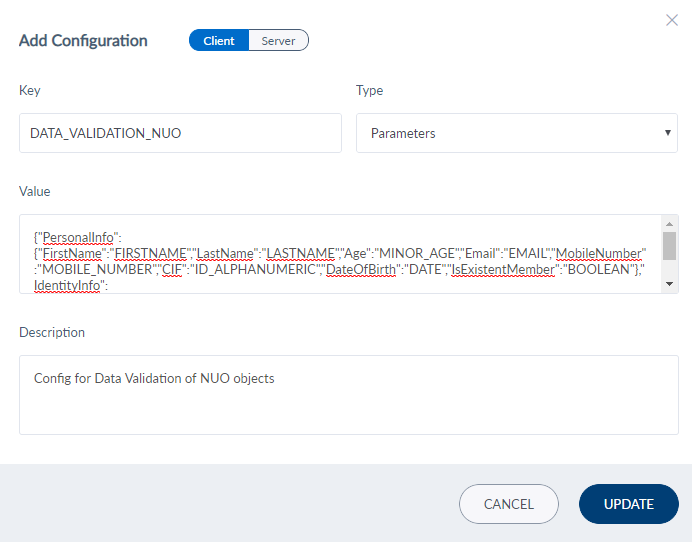
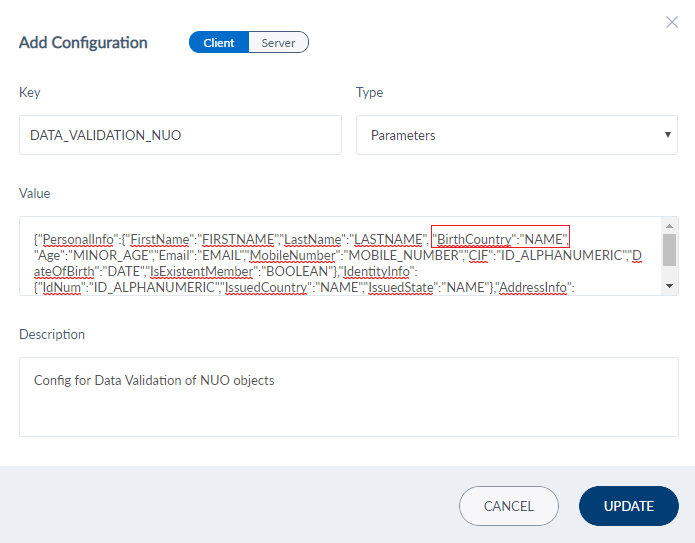
- Search for the DATA_VALIDATION_NUO key and select Edit from the contextual menu. The Add Configuration window appears.
- In the Value field, add the Birth Country field along with the validation rule.
- Click Update.
- After updating the DATA_VALIDATION_NUO key, click Update on the View Bundle page. For more information about adding configurations in the Spotlight app, click here.
The DATA_VALIDATION_NUO is as follows.
{
    "PersonalInfo": {
        "FirstName": "FIRSTNAME",
        "LastName": "LASTNAME",
        "Age": "MINOR_AGE",
        "Email": "EMAIL",
        "MobileNumber": "MOBILE_NUMBER",
        "BirthCountry": "NAME",
        "CIF": "ID_ALPHANUMERIC",
        "DateOfBirth": "DATE",
        "IsExistentMember": "BOOLEAN"
    },
    "IdentityInfo": {
        "IdNum": "ID_ALPHANUMERIC"
    },
    "AddressInfo": {
        "Country": "NAME",
        "State": "NAME",
        "Zipcode": "ZIPCODE"
    }
}
The Birth Country field uses the NAME rule as an example for validating. In the Spotlight app, you can associate every field with a common or custom rule set. To create or use the rules for data validation, refer to Data Validation.
- After configuring the Temenos DigitalOrigination Bundle in the Spotlight app, you must define the following functions in the Form Controller Extension (PersonalInfoControllerExtn) that you created.
- Error scenario for the Birth Country field
showWidgetErrors: function(response) {
    this.super('showWidgetErrors', [response]);
    for (var key in response) {
        if (response[key] !== "") {
            if (key === "BirthCountry") {
                this.view.UserInformation.atbxBirthCountry.flxUnderlineKA.skin = applicationManager.getConfigurationManager().getConfigurationValue("underlineErrorSkin");
                section2Err = response.BirthCountry;
                this.view.UserInformation.lblError2.setVisibility(true);
                this.view.UserInformation.lblError2.text = section2Err;
            }
        }
    }
Map the underlineErrorSkin skin to flxUnderlineKA in the error scenario. The lblError2 label displays the error. - As the Birth Country is a mandatory field, you must define the necessary field validations. To do so, define the following functions in the Personal Information module Form Controller.
These functions map the underlineErrorSkin skin to flxUnderlineKA in an error scenario and disable the Continue button if the Birth Country field is empty.initActions: function() { this.super('initActions', []); this.view.UserInformation.atbxBirthCountry.tbxAnimatedKA.onKeyUp = this.onBirthCountryTextChange.bind(this); }, onBirthCountryTextChange: function() { //called by initActions() if (this.view.UserInformation.atbxBirthCountry.tbxAnimatedKA.text.trim() != "") { this.view.UserInformation.atbxBirthCountry.flxUnderlineKA.skin = applicationManager.getConfigurationManager().getConfigurationValue("underlineSkin"); } this.changeContinueButtonState(); }, isPersonalInformationValid: function() { // called by this.changeContinueButtonState() var isvalid = this.super('isPersonalInformationValid', []); var birthCountry = this.view.UserInformation.atbxBirthCountry.tbxAnimatedKA.text.trim() === "" ? false : true; return isvalid && birthCountry; }
- Error scenario for the Birth Country field
Origination Data Microservice
After you create and configure new fields on the client side, you must extend the ODMS functionality.
Update the ODMS
- Open Postman.
- From the left pane, expand the Storage-MS-API collection.
- Click Update Entity Definition By Code and then navigate to the Body tab.
- In the code, under the entityItemDefinitions, go to the Personal Information entity.
- Add the
BirthCountryparameter in the value of the seed key."seed": "{\"Title\":\"\",\"FirstName\":\"\",\"MiddleName\":\"\",\"LastName\":\"\",\”BirthCountry\”:\”\”,\"DateOfBirth\":\"\",\"Email\":\"\",\"MobileCountryCode\":\"\",\"MobileNumber\":\"\"}" - Then, click Send.
The new field is updated.
Server-side Extensions
This section provides information about the server-side changes required to add the Birth Country field to the Personal Information module.
After implementing the client application and extending the ODMS functionality, you must configure the server-side implementations to bind the UI elements with the back-end data. This involves configuring the following elements:
Java Integration Service
This section explains how to extend the existing data transfer objects to add a new field and store the new data in the back-end.
In the case of adding the Birth Country field, you must configure the java services for the following projects:
Onboarding
To modify the Onboarding Java Service, follow these steps.
- Open your Eclipse project.
- Create a new maven project.
- Add the base Temenos DigitalOrigination Java Project as a dependency in the pom.xml file.
<project xmlns="http://maven.apache.org/POM/4.0.0" xmlns:xsi="http://www.w3.org/2001/XMLSchema-instance" xsi:schemaLocation="http://maven.apache.org/POM/4.0.0 https://maven.apache.org/xsd/maven-4.0.0.xsd">
  <modelVersion>4.0.0</modelVersion>
  <groupId>com.temenos</groupId>
  <artifactId>OnBoardingServicesImpl</artifactId>
  <name>OnBoardingServicesImpl</name>

  <dependencies>
		<dependency>
			<groupId>com.temenos</groupId>
			<artifactId>OnBoardingServices</artifactId>
			<version>0.0.1</version>
		</dependency>
  </dependencies>

</project>
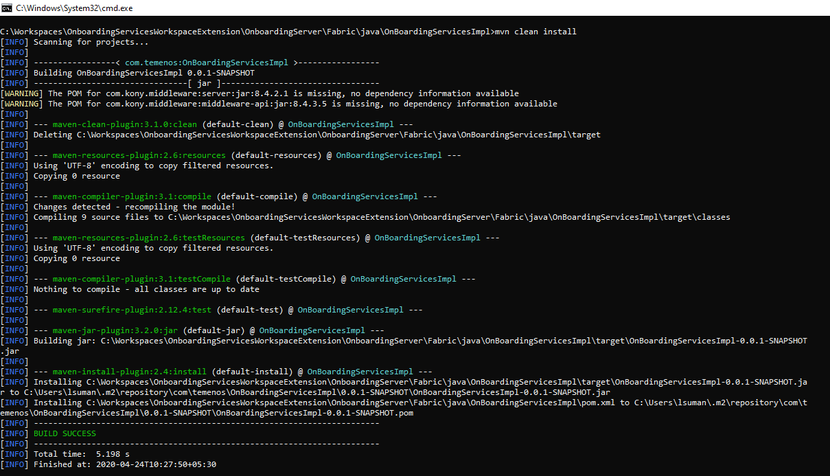
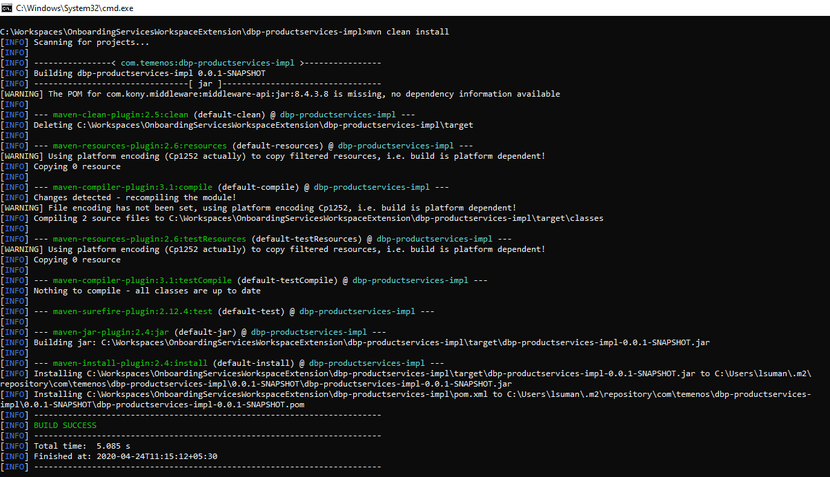
- Build the jar by using the maven commands.
DbpLocalServices
You must configure the Fabric queue system to create a party and a core customer record. To store the new entries in the Party Microservice or Core system, you must extend the DbpLocalServices project.
The DbpLocalServices enables the extensibility of the Party Microservice by default. In the Party Microservice, the product APIs support storage and retrieval of the extension and product data. The product API payload contains the extension data JSON to support extensibility.
The POST/PUT APIs are used to create/update the extension data along with the product data, whereas the GET API retrieves the extension data.
To extend the DbpLocalServices project, follow these steps.
- Open your Eclipse project.
- Create a new maven project and add the DbpLocalServices project as a dependency.
- To add a new field, you must extend the Customer DTO functionality by creating a new class named
CustomerDTOExtn.java.package com.temenos.extn.dbx.product.dto; import com.fasterxml.jackson.annotation.JsonIgnoreProperties; import com.fasterxml.jackson.annotation.JsonInclude; import com.fasterxml.jackson.annotation.JsonInclude.Include; @JsonIgnoreProperties(ignoreUnknown = true) @JsonInclude(value = Include.NON_NULL) public class CustomerDTOExtn { private static final long serialVersionUID = -5256207912161885043L; private String birthCountry; public String getBirthCountry() { return birthCountry; } public void setBirthCountry(String birthCountry) { this.birthCountry = birthCountry; } } - Extend the functionality of the buildCustomerDto method of CustomerUtils invoked from the Resource layer. To do so, create a new class named
CustomerUtilsExtn.java.public static CustomerDTO buildCustomerDTO(String customerID, Map<String, String> inputParamMap, DataControllerRequest dcRequest) { CustomerDTOExtn customerDTO = super.buildCustomerDTO(String customerID, Map<String, String> inputParamMap, DataControllerRequest dcRequest); CustomerDTOExtn.setBirthCountry(dcRequest.getParameter("BirthCountry")); } - Extend the functionality of the buildPartyDTO method invoked from the Business Delegate. To do so, create a new class named
CustomerUtilsExtn.java.public static PartyDTO buildPartyDTO(CustomerDTO customerDTO, PartyDTO partyDTO) { PartyDTO partyData = super.buildPartyDTO(CustomerDTO customerDTO, PartyDTO partyDTO); PartyNames names = partyData.getPartyNames(); names.setExtensionData(customerDTO.getBirthCountry); partyData.setPartyNames(customerDTO.getirthCountry); return partyData } - Build the jar by using the maven commands.
Experience API Changes in Quantum Fabric
For the Birth Country field to work, you must create the back-end data in Quantum Fabric and link it to the front-end data. To do so, follow these steps.
- Sign in to your Quantum Fabric Console. The Applications page opens.
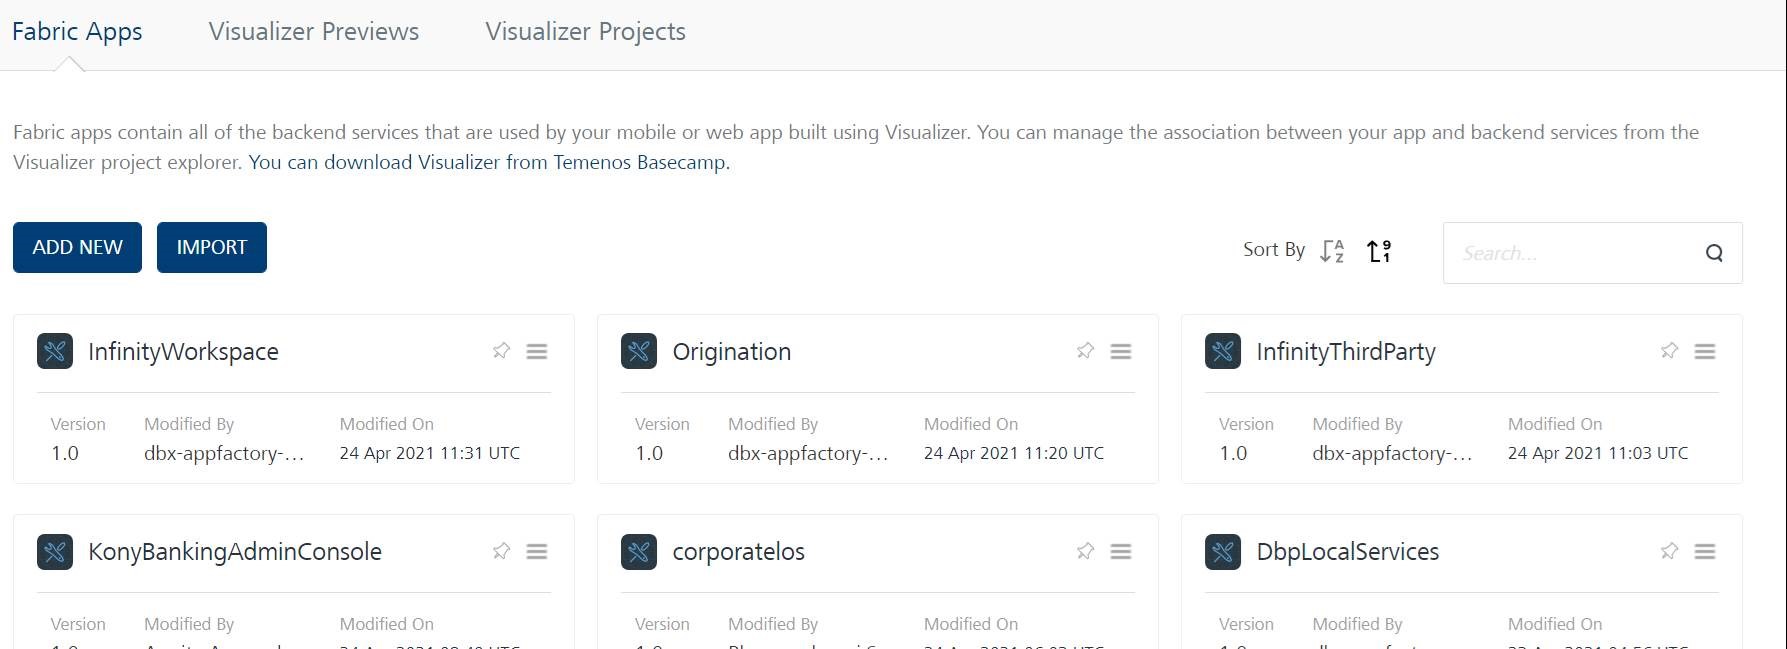
- Open the Origination app from the Applications page.
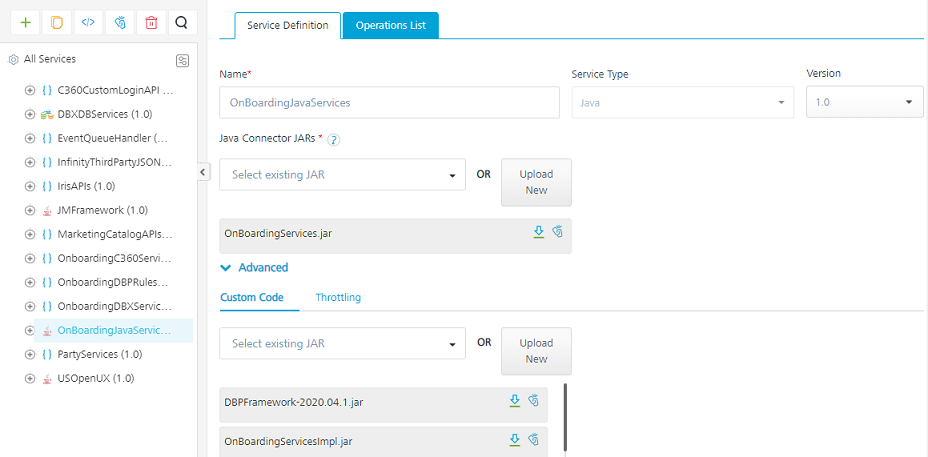
- In the Integration tab, go to the OnboardingJavaServices service definition.
- Expand the Advanced section. In the Custom Code tab, click Upload New and add the java service you configured for the Origination project.
This java service extends the available jar package and binds the new java service as an extended package. It also overrides the existing jar file operations. - Add the BirthCountry field as a request parameter to the applicable operations. For example, createApplicant operation.
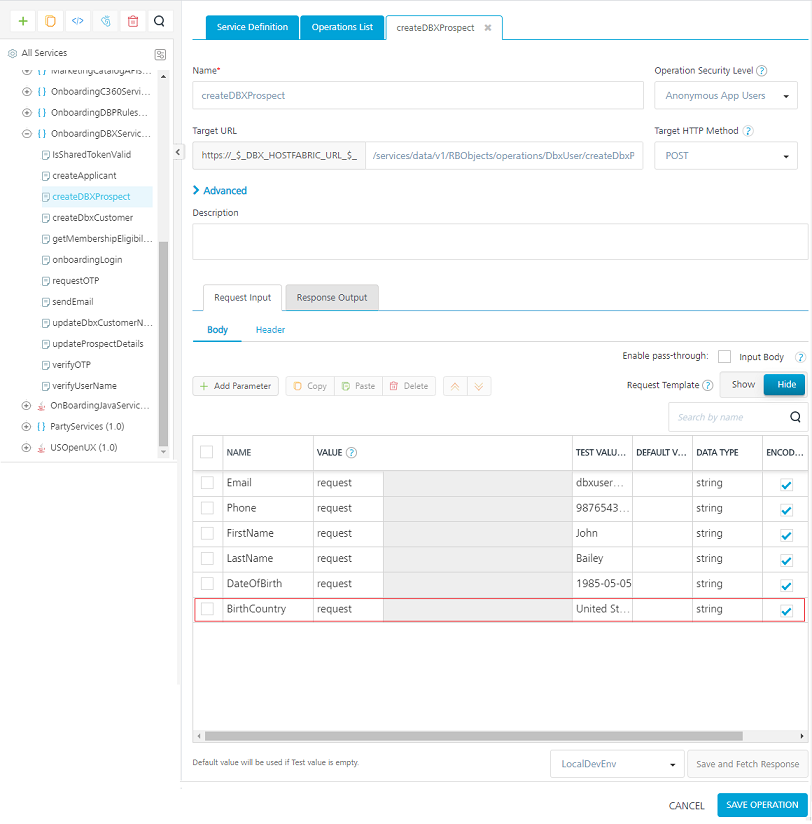
- Go to the OnboardingDBXServices service definition and open the createDBXProspect operation.
- Under the Request Input section, add the BirthCountry field as a request parameter.
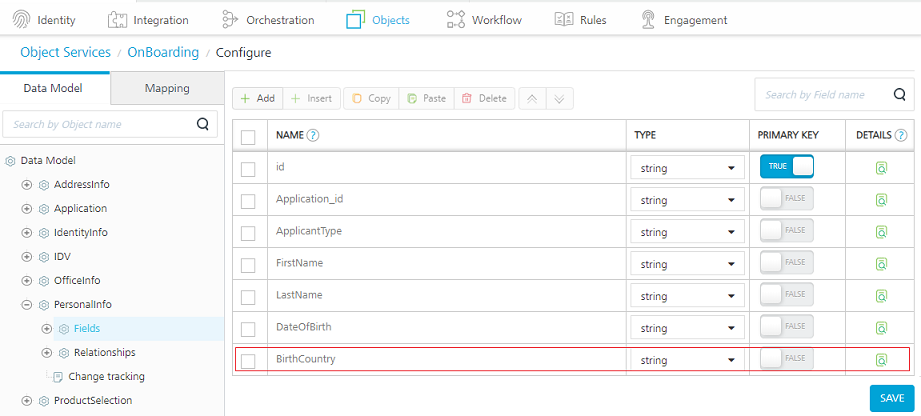
- After adding the request parameter, open the Objects tab, go to the PersonalInfo object model and add the Birth Country entry under Fields.
- Save the changes and publish the application.
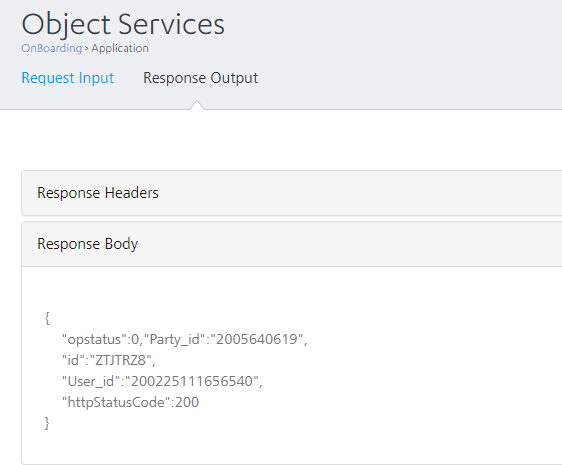
- After publishing the application, test the service from the Console.
Sample Request Payload
{
"Application_id" : "2D5SRWW",
"ApplicantType" : "Applicant",
"FirstName" : "Something",
"LastName" : "Another",
"Email" : "sad@sac.com",
"DateOfBirth" : "1990-10-10",
"MobileCountryCode" : "+91",
"BirthCountry" : "India"
}
Sample Response Output
In this topic
